Below are step-by-step guides to help you navigate the dark web safely. Click to expand each guide.
Getting Started with Tor
This guide explains how to install and use Tor Browser.
- Download Tor Browser from the official site: https://www.torproject.org/download/
- Install and launch the browser.
- Connect to the Tor network.
- Adjust security settings. You should do this to disable javascript on safest settings. To do this click the shield
on Tor browser on the upper right.
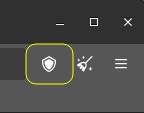
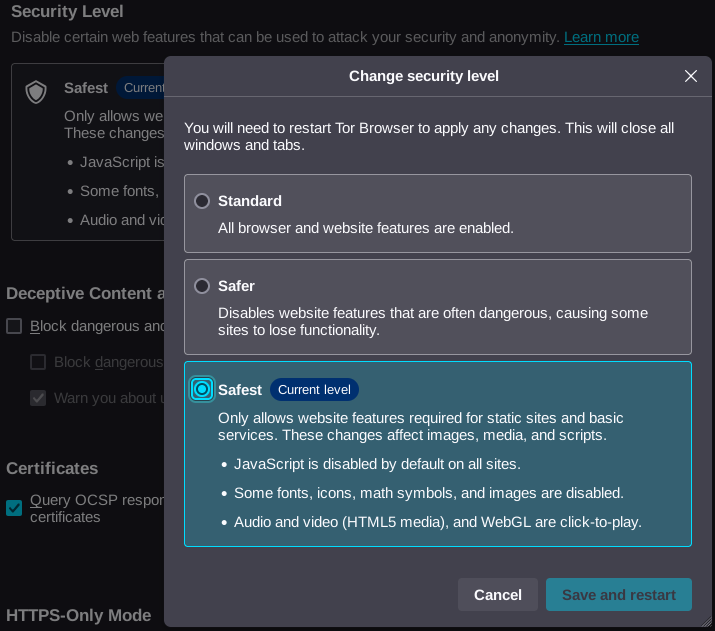
Next you choose the security setting you want. To have javascript disabled you will want the safest option. But this might break some sites. Sites like for example protonmail won't work on safest, you will have to put the setting on safer for those sites to work.
Hard disable javascript (optional)
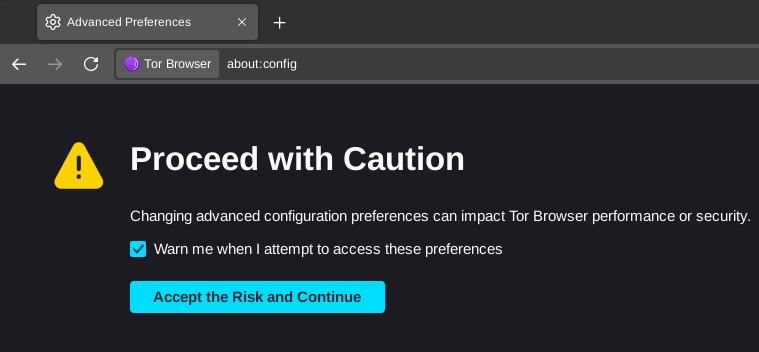
Enter about:config in the address bar. Then click the button "Accept Risk and Continue"
After this you will enter "Javascript" in the search bar and click the button on the right to change the value to "False"
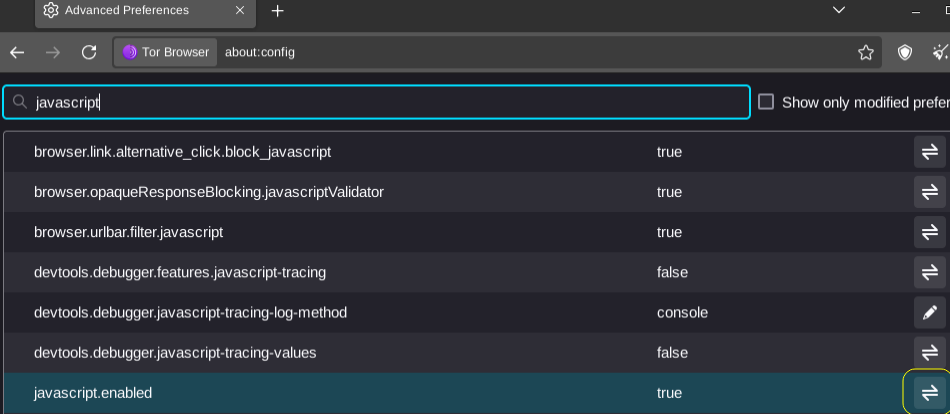
You can change more settings in this screen to customize your Tor Browser, but only do this if you know what you are doing.
Make a bootable Tails USB
Placeholder text: Learn how to create a secure anonymous email account.
General Steps to Install Tails on a USB Drive:1. Download Tails:
Go to the Tails website at https://tails.boum.org. Click on the "Download" button and choose the appropriate version for your system. Tails is available for USB drives in the ISO format. Select a version with the persistence feature if you want to be able to save data on the USB drive.
2. Prepare Your USB Drive:Ensure your USB drive has enough capacity. Tails recommends at least 8 GB, but 16 GB is ideal. Back up any data on the USB drive as the installation process will erase everything.
3. Verify the ISO File (Optional but Recommended):
You can use a utility like checksums.sh or shasum on Linux or macOS, or a file integrity verification tool on Windows to check the checksum of the ISO file.
4. Install Tails on the USB Drive:
For Windows:
Use a tool like Rufus (https://rufus.ie/) or Tails Installer for Windows (https://tails.boum.org/for_windows.html). Open the tool, select your USB drive, choose the Tails ISO file, and click "Start" or "Install" to begin the process.For macOS:
Use a tool like Tails Installer for macOS (https://tails.boum.org/for_macos.html). Follow the instructions on the tool's webpage to download and use it.
For Linux:
Use Gnome Disks (also called Disks), select your USB device and click the 3 points in the upper right of the window and select Restore Disk Image.
5. Boot from the USB Drive:
Restart your computer with the USB drive plugged in. Press the appropriate key to enter the boot menu (often F2, F10, F11, F12, Esc, or Shift). Select the option to boot from the USB drive.
6. First Run:
Tails should now boot, and you will be greeted by the Tails desktop. You can use Tails as a live operating system directly from the USB drive. 7. Save Data (Optional):
If you used a version with persistence, you can save data between sessions by enabling persistence. Please consult the official Tails documentation (https://tails.boum.org/doc) for the most current and detailed instructions specific to your version of Tails and your operating system. Tails regularly updates its software, which could change the process slightly.
Remember to follow all safety guidelines provided by Tails and be aware of any legal implications when using such software.